

Wondering how to stop lipstick bleeding? You are probably curious about how makeup artists (MUAs) stop lipstick bleeding backstage where a clean lip has to put up with a lot including talking, eating, drinking, hot stage lights, hours of wear and more. All these can definitely turn a crisp lip into a messy one if the application isn’t right from the start.
There is no single magic wand that keeps lipstick from creeping outside the lip line. It is all about nailing a few simple techniques right from getting the lips ready, creating a clean edge, applying the colour carefully and making sure there isn’t too much product left behind. Let’s take a look at the preparation, application, setting and quick correction tricks that help stop lipstick bleeding.
Key Takeaways
- Prepare the lips first so lipstick isn’t sitting on dry or excess-balm-covered skin.
- Use a clearly defined lip edge to help contain the colour.
- Apply lipstick in controlled layers rather than depositing a heavy amount at once.
- Blot and set the lip to remove excess surface product and improve control.
- Check the Cupid’s bow, corners and surrounding lip line before the talent goes on camera or stage.
- If lipstick has already bled, clean the migrated colour before redefining and reapplying the lip.
How Do MUAs Stop Lipstick Bleeding?
If you’ve watched a makeup artist create a sharp, polished lip backstage, there is usually more going on than simply applying lipstick neatly and hoping it stays there.
In general, the professional sequence in how to stop lipstick bleeding runs in a fairly consistent order: prepare, define, apply, blot, set and inspect.
Each stage builds on the one before it. You don’t want to skip any single step as it will show up later, usually right when the makeup needs to hold up the most. You don’t want to reach for a heavier or drier lipstick and hope for the best. It’s to control exactly where the colour sits from the very first step. This way there will be nothing left to migrate in the first place.
It’s also worth distinguishing bleeding and feathering from ordinary lipstick transfer. The former is when colour travels into the fine lines and skin surrounding your lips, while the latter is when lipstick simply rubs off onto a glass, a mask or someone’s collar and the likes.
They’re different problems with different causes, and this routine is built specifically to address the former.
That kind of control becomes especially important when makeup needs to stay precise for hours. That’s exactly the sort of conditions backstage and on-set MUAs deal with every day.
Start With Proper Lip Preparation
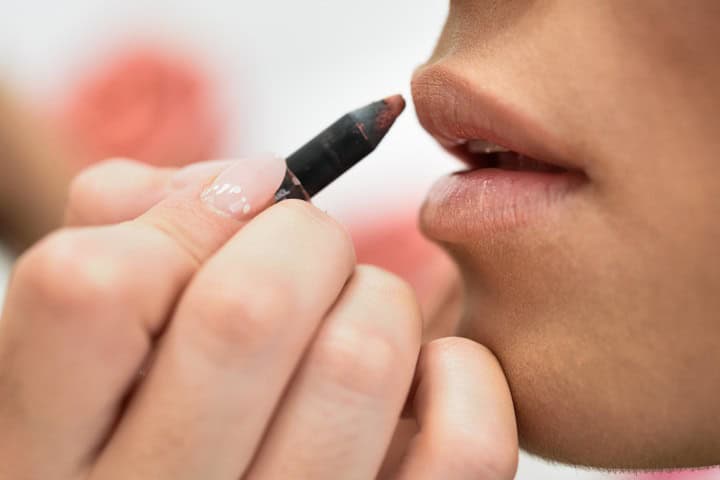

Before any colour goes anywhere near the lips, MUAs looks closely at the condition of the skin itself.
Dry, flaking skin will tend to create an uneven surface that lipstick clings to unevenly. Any unevenness is often where feathering starts. This is the best place to start if you are exploring how to stop lips from bleeding.
You can gently remove any loose or dry skin, usually with a soft lip scrub or a damp cloth. This gives the lipstick a smoother base to sit on. From there, a light conditioning step helps, but it has to be done carefully. The goal is a smooth, supple surface, not a thick, slippery layer sitting on top of the lips right before colour goes on.
Keep in mind that any lip balm or conditioning product needs time to actually settle and absorb. It shouldn’t be applied and then covered with liner and lipstick immediately.
Once it’s had a moment to sink in, blotting away any remaining excess moisture or product is essential. In fact, leftover slip on the lips is one of the more overlooked reasons lipstick starts moving before it’s even finished setting.
Tip: if the lips still feel tacky or slick to the touch after conditioning, they’re not ready for liner yet. A quick blot with a tissue will solve this in seconds and it will save you a lot of correction time later:
- Gently exfoliate any dry or flaking skin
- Apply a light conditioning balm
- Allow the product a moment to settle
- Blot away excess moisture or product
- Confirm the surface feels smooth, not slick, before moving on
Create a Barrier Around the Lip Line
Once the lips are properly prepped, a lip liner does the real containment work.
Just follow your natural lip line and keep the outline clean and defined. This way you will give yourself a clear edge to work with when you apply the lipstick. A natural-toned liner can help define that perimeter without leaving a hard, visible outline once you apply the lipstick over it.
Transparent or clear lip pencils are worth mentioning as an alternative here too. This is best fit for artists who want the containment benefit of a liner without adding any tone of their own into the mix. Whichever the option used, precision around the Cupid’s bow and the corners of the mouth deserves extra attention. Mind you these are the areas where small mistakes become the most noticeable, especially under close camera work or bright stage lighting.
After all the purpose of this step is containment and definition working together. It’s not decorative, it’s structural!
| Barrier Type | Best For |
|---|---|
| Natural-toned liner | Defining the edge while keeping a soft, blended look |
| Transparent/clear pencil | Containment without adding colour or altering the natural lip tone |
For artists working across a range of lip colours and skin tones, a reliable lip liner to prevent lipstick feathering is one of the more essential tools in a backstage kit.
This is precisely because this step does so much of the actual containment work before a single layer of colour goes on.
Apply Lipstick in Thin, Controlled Layers
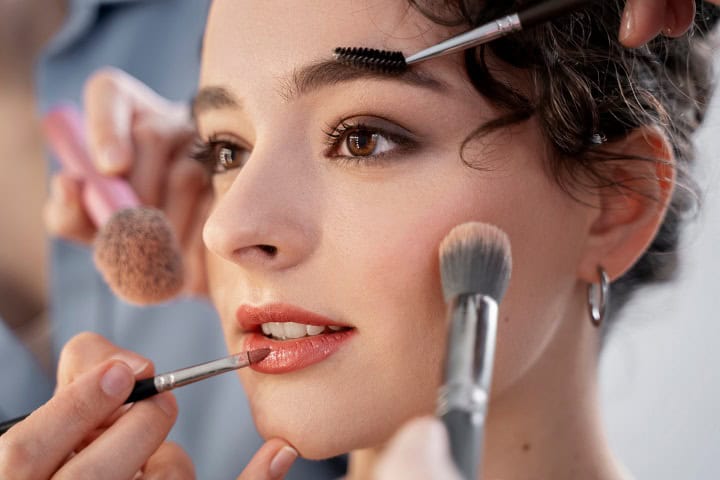
Once the edge is defined, the temptation is to fill the lip in one confident sweep. Resist it!
Applying lipstick in thin, controlled layers gives far more control than depositing a thick amount all at once. More so with strongly pigmented or highly saturated shades that are much harder to correct once they’re already down.
A lip brush comes in handy in terms of getting the precision right.
Instead of pulling colour straight from the bullet across the whole lip, you ought to define the edges first with the brush, then fill in the rest of the lips. This will keep the outer boundary clean and deliberate.
The good thing about building colour gradually, layer by layer, rather than saturating the perimeter immediately is that any small correction that pops up long the way is far easier to make before the whole lip is committed to full colour.
Here is a three-stage application checklist in a nutshell:
- Define the edges with a lip brush
- Fill the centre of the lip with a light first layer
- Build a second layer gradually, checking the edge as you go
For precision-focused work specifically, many MUAs go for lip pencils that prevent bleeding and feathering to reinforce the edge throughout the application process as opposed to relying on a single liner step at the very start.
Blot, Set and Build the Lip
After the first layer goes on, blotting removes the excess surface product that hasn’t properly bonded to the lip. This counts for more than it might seem. That surface layer is exactly the part most likely to move, transfer, or feather if left untouched. Well, a single tissue pressed gently against the lips is usually enough.
From there, a second more controlled layer builds the final depth of colour. You don’t want to pile on a thick single application that was never blotted in the first place. Ensure you press a tissue over the lips then dust a small amount of translucent powder through it. The powder helps set the layer beneath without dulling the finish on top.
It’s worth being careful here. The target is to control excess product, not drying the lips out entirely. Also, any heavy-handed powder application is bound to make lips look chalky plus it can settle unevenly into any texture on the lip’s surface.
Here is a brief overview of what each step actually does
| Action | Purpose | Result |
|---|---|---|
| Blot first layer | Removes excess surface product | Reduces risk of transfer and movement |
| Powder through tissue | Sets the layer beneath | Improves longevity without heavy texture |
| Apply second layer | Builds final colour depth | Rich finish that’s less likely to migrate |
Choose the Formula With the Finish in Mind
Lipstick texture and formula does have bearing on how readily colour moves. It is thus worth factoring this into the whole process.
More mobile, slick formulas, glossy or highly emollient lipsticks, tend to have more natural movement built into them. This can make containment slightly harder even with perfect technique elsewhere.
It’s tempting to assume the solution is simply reaching for the most matte formula available, but that’s not necessarily true either.
Very matte formulas can grip onto dry or textured skin unevenly, which means they actually demand more measured lip preparation. Remember that formula choice works alongside preparation and application technique, it doesn’t replace either of them.
| Formula Characteristic | Potential Behaviour | MUA Consideration |
|---|---|---|
| Glossy/emollient | More natural movement and slip | Requires stronger liner containment |
| Satin/cream | Balanced hold with moderate movement | Generally forgiving with standard technique |
| Very matte | Can grip unevenly on dry or textured skin | Needs thorough lip preparation beforehand |
Artists working across multiple looks in a single day often keep a set of professional lip colour palettes on hand specifically so they can match formula to the demands of the shoot or performance. This is a smart way to avoid relying on one all-purpose lipstick for every situation.
The Backstage Lipstick Check Before the Talent Goes On
The final inspection before someone steps in front of a camera or under stage lights is where a lot of small problems get caught before they become visible mistakes. This check should be quick, but it shouldn’t be skipped, even when time is tight.
- Start with the Cupid’s bow specifically, checking for excess colour pooling or an uneven edge on either side.
- Move to the corners of the mouth next, since product tends to accumulate or shift there more than almost anywhere else on the lip.
- Inspect the skin immediately surrounding the lips closely for any migrated colour that might not be obvious from a normal viewing distance.
- Remove anything found before the talent goes on, using a precise tool rather than a broad wipe that could disturb the rest of the look.
- Wherever possible, recheck the finished lip from a couple of different angles and, ideally, under the actual lighting it’ll be seen under, stage lighting and camera lighting can both reveal small issues that look completely fine under a standard vanity mirror.
Keeping essential correction tools within arm’s reach throughout this check means any last-second fix takes seconds rather than a full trip back to the kit.
Final 30-second check:
- Cupid’s bow: clean edge, no pooling
- Corners: no buildup or migration
- Surrounding skin: no stray colour
- Overall shape: symmetrical from a front-on view
- Lighting check: verified under stage or set lighting where possible
This same attention to a controlled, camera-ready lip applies just as directly to broader performance contexts, including stage makeup for dancers, where lighting and movement place similar demands on a clean, long-lasting lip.
How to Fix Lipstick That Has Already Bled
Now, what if the lipstick has already started creeping outside your lip line? Adding more colour might seem like the quickest fix, but it usually makes the mess more noticeable.
You can start with cleaning away the lipstick that has moved beyond your natural lip edge. Once the skin around the lips is clean again, you can tidy up the line and reapply the colour without adding to the problem.
A precise correction tool, a cotton swab dipped lightly in makeup remover or micellar water works well, lets a MUA clean up the migrated colour without disturbing the rest of the finished makeup nearby.
Once that area is clean, the lip edge needs to be re-established, essentially returning to the liner step to redraw a clean, accurate boundary before any colour goes back on.
Only the necessary amount of lipstick should be reapplied to the corrected area. Make sure you match it carefully to the rest of the lip; don’t reapply the whole thing from scratch.
Before calling the fix complete, it’s worth rechecking the Cupid’s bow, the corners, and any fine lines nearby one more time; correction in one spot can sometimes reveal a smaller issue nearby that wasn’t as obvious before.
Throughout this whole process, keeping the correction contained and controlled protects the rest of the makeup from unnecessary disturbance.
Conclusion
That’s it on how to stop lipstick bleeding the MUA way! In a nutshell, stopping lipstick bleeding really comes down to controlling the application from the very first step instead of trying to fix the problem after it’s already happened.
The sequence holds up because every stage supports the next: prepare the lips properly, define a clean edge, apply the colour lightly and in layers, then blot, set and give the finished lip one final, honest inspection.
The backstage principle worth carrying into any application is simple: check the lip before the talent goes on, not after, because that’s the moment a small five-second fix is still possible!
FAQs
Does lip liner stop lipstick from bleeding?
Lip liner plays a major role as it creates a defined boundary that contains the colour. It works best alongside proper lip preparation and controlled application rather than as a fix on its own.
Why does lipstick bleed into wrinkles?
Fine lines around the mouth can cause lipstick to feather, especially with fluid or creamy formulas. The risk tends to increase when the skin hasn’t been properly prepared or when too much product is applied at once. In case you are looking for how to stop lipstick bleeding into wrinkles, here is how to fix this: start with smooth, well-prepped skin, keep the colour layer thin and remove any excess before it has time to settle around the mouth.
Can you stop lipstick bleeding without lip liner?
It’s considerably harder without a liner. The liner provides the clearest physical boundary for the colour, but proper preparation, thin controlled layers and thorough blotting can still reduce bleeding noticeably even without one.
How do you fix lipstick that has already bled?
Remove the migrated colour with a precise tool. Make sure you clean the surrounding skin, re-establish the lip edge with liner, and reapply only the colour needed to correct the affected area.
Does lip primer help stop lipstick bleeding?
A lip primer can help create a smoother, more even base for lipstick to grip onto. This supports the overall routine, though it works as part of the preparation stage rather than replacing liner or controlled application.


Hey there! I’m Isabelle Kerrington, and I’m thrilled to share my passion for the performing arts through my blog. Focusing on theatre makeup, my posts will cover everything from product recommendations to helpful tips and engaging tutorials. Join me on this exciting journey as we explore the magical world of theatre makeup together.