How to Clean Your Airbrush Kit Properly
10th December, 2023
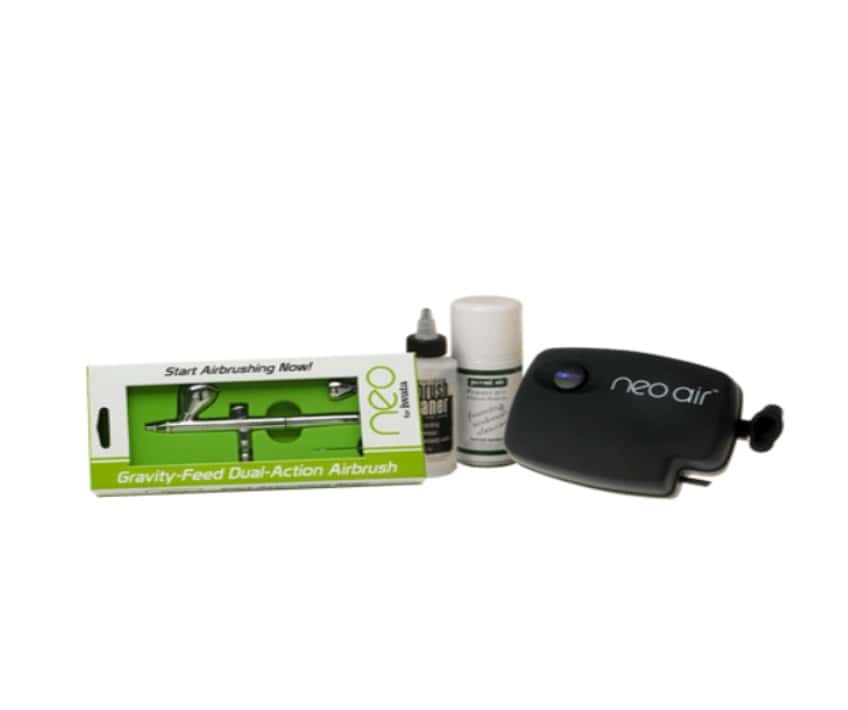
Airbrushing is a fantastic technique for achieving smooth and precise paint application, suitable for makeup artists of various skill abilities. However, to ensure your airbrush kit consistently delivers stunning results, it’s essential to know how to clean it properly. In this article, you will learn how to clean your airbrush properly, from removing tip dry to performing deep cleaning. By following these easy-to-follow instructions, your airbrush will always be ready to create your masterpiece. NOTE: For clarity, this article will mainly focus on cleaning an Iwata Airbrush.
Are you a fan of cosplay? Explore our cosplay makeup collection.
Common Problems When An Airbrush Isn’t Cleaned Properly
Before we go into detail about how to clean your airbrush kit properly, you first need to know what problems can occur if you fail to clean your airbrush appropriately.
Removing The Dry Tip
Dry tip occurs when dry paint gathers on the needle’s tapered tip. This buildup can wreak havoc in two ways:
- Paint Splatter: This occurs when a big blob of paint spits out of the tip onto your work.
- Clogged Airbrush: Alternatively, tip dry can seal up the business end of your airbrush, causing it to stubbornly refuse to spray.
To avoid these problems, you need to know how to effectively remove tip dry and keep your airbrush performing at its best.
Colour Changes
Changing colours with your airbrush is perhaps the most exciting aspect of knowing how to clean your airbrush. However, you must ensure that your airbrush’s colour cup is spotless before switching from one tone to another. This is especially important when transitioning between colours on opposite ends of the colour wheel, such as yellow to violet.
If you don’t clean your colour cup thoroughly, remnants of the previous colour can mix with the new one, resulting in the wrong colour being produced. To prevent colour contamination and achieve the best results, flush your colour cup multiple times to ensure that the previous colour tone is fully empty from the cartridge.
End of Spray Session
It’s crucial to clean your airbrush after each use. Failing to do so can lead to issues in your other makeup projects. To consistently have a fantastic airbrushing experience, follow the tips below for cleaning an Iwata Airbrush Cleaning Kit.
Deep Clean
Airbrushes can occasionally act up, such as bubbling in the colour cup, reduced spray patterns, or even refusing to spray altogether. This is where you need to perform a “deep clean.” Now that you are aware of the common problems that can occur when you don’t clean your airbrush, we recommend soaking the nozzle, nozzle cap, and needle cap in a suitable airbrush cleaner. This helps to break down dried paint, making it easier to remove. Never dip or “wet dock” your entire airbrush in any liquid, as this can create more problems than solutions.
Step by Step Guide to Cleaning an Airbrush
Maintaining your airbrush is crucial for a consistent performance. Paint flows through various components of your airbrush, and these areas must be kept clean to ensure optimal results. Here’s how to clean your airbrush properly:
Step 1: Flushing out paint between colour changes and after sessions
For this section, we highly recommend having Ben Nye airbrush paints at your disposal.
For Gravity Feed Airbrushes:
- 1a. If your airbrush has a cup lid, remove it and empty any excess paint from the colour cup.
- 1b. Utilise a Iwata Washing Brush along with a Medea Airbrush Cleaner (or a suitable cleaner) to alternate between cleaning and wiping the cup.
- 1c. Spray through the airbrush until the spray is clear of colours. Direct the spray into a spray-out container or onto a paper towel.
For Syphon Feed Airbrushes:
- 1a. Dismantle the paint bottle from the bottom of the airbrush.
- 1b. Fill a clear bottle with Medea Airbrush Cleaner (or a similar cleaner for this product). Then, attach this bottle to the airbrush.
- 1c. Spray through the airbrush until the spray is clear of colours. Direct the spray into a designated pot or a disposable towel.
If you’re transitioning between colours, you can now continue airbrushing with the new colour. However, if you’re ending an airbrush session, proceed to step 2.
Step 2: Removing and cleaning the needle safely
By this point, you should have disconnected your airbrush from the air source.
- 2a. Dismantle the back handle, and place it on a stable surface so that the parts won’t roll away.
- 2b. Use your hand to delicately loosen the needle chucking nut.
- 2c. Carefully pull out the needle. Be mindful that needles are extremely sharp and delicate, so avoid dropping or damaging them during cleaning.
- 2d. Wipe the needle using a small amount of Medea Airbrush Cleaner (or a similar cleaner), and only wipe towards the sharp needle point. Use a back-to-front motion to avoid any accidental punctures.
If you’re facing issues like clogs, uneven spraying, or paint build-up, keep your airbrush disassembled and proceed to steps 3-8.
However, if you’re concluding an airbrush session, follow the next instructions:
- Gently push the needle back into its place, ensuring it comes to a complete stop.
- Tighten the needle chucking nut by hand. Reassemble your airbrush and reconnect it to your air source.
- To reassure yourself if the needle is sealed properly, fill the colour cup or a bottle with water and press the main lever down gently for air testing.
- Be aware that water will spray out if the needle is not seated properly.
- Remember that the airbrush should only spray water after the trigger has been activated. If not, then adjust the knob that controls and adjusts the fluid for single-action airbrushes.
- If there’s no water spray, tighten the needle chucking nut. If issues persist, review the assembly and repeat the cleaning instructions if necessary.
3. Removing the nozzle
Removing the nozzle is a crucial step in your airbrush cleaning routine.
- Unscrew the needle cap (1) and nozzle cap (2) by hand.
- For Iwata Eclipse airbrushes, remove the nozzle head cap (3) using a nozzle head cap wrench; one should be included with the kit.
When using Iwata Eclipse airbrushes with a compression fit nozzle:
- The nozzle (4) for Eclipse BS, SBS, and CS models is a set; do not separate these.
- Avoid using the Iwata Nozzle Wrench on selected compression fit nozzles.
- Press against the body of the nozzle at an angle in order to remove it. Check inside the nozzle head cap if the nozzle appears to be missing, and use the blunt end of the needle to remove it.
4. Cleaning nozzle and caps
Properly cleaning the nozzle and caps is essential for maintaining your airbrush. Follow these steps:
- Loosen the paint residue by: soaking the nozzle, needle cap, nozzle head cap (or compression nozzle) for a maximum of ten minutes.
- Do not soak the entire airbrush in liquid.
- Do not store your airbrush alongside other cleaning agents within the fluid cup.
- WARNING: The nozzle contains nickel, so handle it with care.
5. Cleaning the paint passage
Cleaning the paint passage ensures that the airbrush operates smoothly. Here’s how:
- For gravity-feed airbrushes, add the cleaning brush inside the colour cup paint passage, located near the front of the airbrush. For bottom-feed airbrushes, use a pipe cleaner to brush up inside the bottle joint, towards the front of the airbrush.
- Adopt a scrubbing motion, twisting in and out of the bottle joint. This will help to remove all paint debris inside, and this task will be complete once there is no debris left on the brush or pipe cleaner.
6. Check all parts and the passage for potential damage and paint leftover
Regularly inspecting your airbrush is vital. Here’s what to look for:
- The best tool to use here is the Iwata LED Magnifier, which can magnify blue and white LED lights which can be used for:
- Checking the nozzle for potential cracks, dents, or distortion.
- Inspecting the needle for any marks or bends.
- Examine the airbrush’s paint passages for any paint debris.
- If any parts are damaged, you’ll need to reorder the specific part. Contact your Iwata retailer for ordering. For frequent airbrush users, having extra needles and nozzles is a wise choice, as these parts can be easily damaged.
7. Clean the outside of your Airbrush
Don’t forget to clean the exterior of your airbrush:
- Use a pipe cleaner that has been dipped in Medea Airbrush Cleaner which can clean smaller areas where paint will likely have built up.
8. Rebuilding and lubricating the Airbrush
If you are using an airbrush with a threaded nozzle, follow the instructions below:
- Use a Medea Thread Sealer and apply it to both opposite sides of the nozzle threads. Do not let this sealer enter the inside of the nozzle.
- Use the Iwata nozzle wrench to screw the nozzle back on. Do not overtighten.
- Only apply the Medea thread sealer to four sides of the nozzle cap threads, which can be found on the airbrush body. Again, do not let the sealer enter inside the airbrush head. Once done, screw the nozzle cap and needle cap back on snuggly.
9. Final testing
After reassembling your airbrush, it’s crucial to perform a final test to ensure it’s working perfectly:
- The air source should be reconnected and then you can fill the colour cup or a bottle with water.
- Gently push the main lever down to test for air. Water will spray out if the needle is not seated properly. After all, water should only spray after the main lever has been pulled back. If not, simply adjust the knob which controls fluid adjustment for those with single-action airbrushes.
- However, if no water sprays at all, try tightening the needle chucking nut steadily. If this still fails to work, you may have to reassemble the parts again.
Ensure a Quality Performance with Your Airbrush Kit
In conclusion, maintaining your airbrush is essential for a consistent and reliable performance. By following these straightforward steps, you can ensure your airbrush remains in top condition. For further airbrush news and makeup tips, have a look at the ten best airbrush makeup techniques. No matter your skill level, an airbrush kit is an essential tool to have, especially in makeup kits for beginners.
FAQs
What should I use to clean my airbrush?
Can I use white spirit to clean my airbrush?
What is the best fluid for cleaning an airbrush?
Can you clean an airbrush without an airbrush cleaner?
Sources
Marlys, M., Price, D., (2023) The 10 Best Airbrush Makeup Products for Truly Flawless Skin. Good Housekeeping. [online] Available at: https://www.goodhousekeeping.com/beauty/makeup/g32984720/best-airbrush-makeup/ [accessed 16/11/23]
Hey there! I’m Isabelle Kerrington, and I’m thrilled to share my passion for the performing arts through my blog. Focusing on theatre makeup, my posts will cover everything from product recommendations to helpful tips and engaging tutorials. Join me on this exciting journey as we explore the magical world of theatre makeup together.